
This is my fourth post of the "Learning Umbraco in a week" series. The main agenda of this post is listed below.
- What are Umbraco Macros?
- How to use Macros as building blocks in Umbraco?
- How Umbraco uses XSLT?
- Creating XSLT Macro
- Understanding the "currentPage" parameter
- Understanding the XML Document Schema (v4.7)
- XPATH Axes in Umbraco
- A look at XSLT Macro Snippets
What are Umbraco Macros?
Macros are used to get and display data from Umbraco. For example, site maps, navigation, and news lists. This can be done using XSLT. Umbraco includes several pre-built XSLT Macros, and you can also create your own.
Umbraco Macros can also be used to wrap .NET user controls or custom controls, to include those in your Web Page.
How to use Macros as building blocks in Umbraco?
Umbraco Macros can also be used to wrap .NET user controls or custom controls, to include those in your Web Page.
How to use Macros as building blocks in Umbraco?
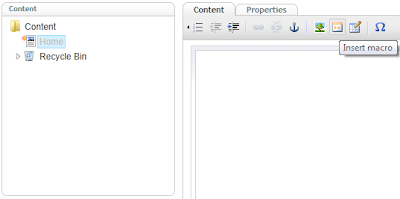
In Umbraco, Macros are small building blocks of functionality that can be dropped into an editor. Each Macro encompasses a piece of functionality, and provides a simple interface to be able to modify the macro to you requirements. Importantly, Macros can be placed in transforms, templates, and rich-text, and the Umbraco GUI provides a button for this in the relevant section.
How Umbraco uses XSLT?
Umbraco utilizes XSLT to dynamically render content such as navigational structures, lists, and nearly anything you can dream of. This is accomplished through the use of Macros.

Creating XSLT Macro
Creating a Macro in Umbraco is very easy.

For creating an XSLT Macro in Umbraco, follow the steps below.

Understanding the "currentPage" parameter

How Umbraco uses XSLT?
Umbraco utilizes XSLT to dynamically render content such as navigational structures, lists, and nearly anything you can dream of. This is accomplished through the use of Macros.

Creating XSLT Macro
Creating a Macro in Umbraco is very easy.

For creating an XSLT Macro in Umbraco, follow the steps below.
- Go to Umbraco Default Page (Admin Page) > Sections > Developer > XSLT Files.
- Right click on the XSLT Files node, and select create.
- You will receive a dialog where you can specify the name, select an XSLT template, and specify if you want to automatically create the Macro for this template.
- Specify the name of the new XSLT file, check Create Macro, and select a template if you desire. Click Create.
- You have now created the XSLT file and the Macro for rendering the Content.

Understanding the "currentPage" parameter
The currentPage parameter is the complete XML document of the published site, and is how we reference the data stored in each document.
It is important to note that, by default, the context of the XML document is set to the requested Web Page. The XML document, as mentioned before, contains all the content of the published documents. This data is stored in the XML document structured in the same manner as your tree is laid out in Umbraco. So, documents are nested to create the hierarchy that we can easily use.
An Umbraco Node (The "currentPage" parameter) consists of several common pieces of data, and they are listed below.
- id
- version
- parentID
- level
- writerID
- creatorID
- nodeType
- template sortOrder
- createDate
- updateDate
- nodeName
- urlName
- writerName
- creatorName
- nodeTypeAlias path
All these are store as Attributes of the Document (Also called "Node").
Moreover, the Properties that are added to the Document in Umbraco, and what the user edits are referenced as "Data". Data consists of a couple common pieces of data, which are Attributes on the data elements. These are listed below.
Moreover, the Properties that are added to the Document in Umbraco, and what the user edits are referenced as "Data". Data consists of a couple common pieces of data, which are Attributes on the data elements. These are listed below.
- alias
- versionID
Understanding the XML Document Schema (v4.7)
In Umbraco, each Document Type has it's own Node using the Document Type alias - <Home> as opposed to the previous convention <node documentTypeAlias="home">.
Each Property has it's own Node underneath the Document Type node <umbracoNaviHide> as opposed to the previous convention <data alias="umbracoNaviHide">.
It is important to note that, the difference between a Document Type Node and a Property Node is that the Document Type Node has the blank attribute isDoc <home isDoc"">

XPATH Axes in Umbraco
XPATH works on the premise of Axes, which is how the data relates to the Current Node in Umbraco as well.

$currentPage/node
$currentPage/../
$currentPage//node
A look at XSLT Macro Snippets
For a practical understanding of XSLT Macros, a list of XSLT Macro snippets is provided below.
1. For each child Node of a specific Document Type Alias
<xsl:for-each select="$currentPage/NewsItem"> </xsl:for-each>
However for whatever reason if you want to have a document type alias and a document type property with the same alias it would select both.
<xsl:for-each select="$currentPage/NewsItem [@isDoc]"> </xsl:for-each>
2. For each child Node excluding a specific Document Type Alias
<xsl:for-each select = "$currentPage/*[not(self::NewsItem)]" > </xsl:for-each>
3. For each child Node
<xsl:for-each select="$currentPage/* [@isDoc]"> </xsl:for-each>
This example selects all xml nodes underneath the currentPage item using the * selector.
However without the [@isDoc] section it would select all nodes including those which are just document type properties.
4. For each child Node via a selectable source
This example shows you how to list childnodes from the nodeID of the contentpicker.
<xsl:param name="Source" select = "$currentPage/mySource" />
<xsl:for-each select = "umbraco.library:GetXmlNodeById($Source)/DocType">
</xsl:for-each>
5. For Each node of a specific Document Type Alias
<xsl:for-each select="$currentPage/ancestor-or-self::Home//MyDocumentType [@isDoc]">
</xsl:for-each>
This example walks upto the top level node/dcoument type with the alias of Home. So this is a fairly expensive XPath call.
Then it looks through all the child nodes no matter how deep to find the node (document type) with the alias of MyDocumentType.
6. Using a Macro parameter to get a Document Type Property
<xsl:value-of select="$currentPage/* [name() = $myMacroParameter and not(@isDoc)]" />
This example selects the child node where it's name matches the value in myMacroParameter and checks to see if that it does not have the isDoc attribute.
7. Using GetMedia Umbraco Method to load Images
This code loops through the images in a media folder as specified by a media picker.
<xsl:for-each select="umbraco.library:GetMedia($images, true())/Image">
<xsl:variable name="picFile" select="umbracoFile"/>
<xsl:variable name="picW" select="umbracoWidth"/>
<xsl:variable name="picH" select="umbracoHeight"/>
<img >
<xsl:attribute name="src">
<xsl:value-of select = "$picFile"/>
</xsl:attribute>
</img>
</xsl:for-each>
That's all for this post, in the next post (Learning Umbraco in a week - Day V) we will have a look at .Net Macros in Umbraco.
XPATH works on the premise of Axes, which is how the data relates to the Current Node in Umbraco as well.

- Self Axis - While it is rarely used, the self axis actually returns the node in reference.
- Child Axis - The child axis select the nodes immediately below the node in reference. While the verbose method is rarely used, it is here for reference.
$currentPage/node
- Parent Axis - The parent axis allows us to see the node immediately above the node in reference.
$currentPage/../
- Descendant Axis - The descendant axis retrieves all nodes below the node in reference no matter the depth.
$currentPage//node
- Descendant-or-Self Axis - The descendant-or-self axis returns all nodes below the current node, but also returns the node in reference to the command..
- Ancestor Axis - The ancestor axis selects all nodes that are ancestors, or the parent, and the parent's parent, and so on, to the node in reference..
- Ancestor-or-Self Axis - The ancestor-or-self axis selects all nodes that are ancestors, or the parent, and the parent's parent, and so on, including the node in reference.
- Preceding Axis - The preceding axis selects all nodes no matter the depth, that are located on parent-level and who are also located before (preceding) its parent of the node in reference.
- Preceding-Sibling Axis - The preceding-sibling axis selects all nodes that are located on the same level who are also located before (preceding) the node in reference..
- Following Axis - The following axis selects all nodes no matter the depth, that are located on parent-level and who are also located after (following) its parent of the node in reference.
- Following-Sibling Axis - The following-sibling axis selects all nodes that are located on the same level who are also located before (following) the node in reference.
A look at XSLT Macro Snippets
For a practical understanding of XSLT Macros, a list of XSLT Macro snippets is provided below.
1. For each child Node of a specific Document Type Alias
<xsl:for-each select="$currentPage/NewsItem"> </xsl:for-each>
However for whatever reason if you want to have a document type alias and a document type property with the same alias it would select both.
<xsl:for-each select="$currentPage/NewsItem [@isDoc]"> </xsl:for-each>
2. For each child Node excluding a specific Document Type Alias
<xsl:for-each select = "$currentPage/*[not(self::NewsItem)]" > </xsl:for-each>
3. For each child Node
<xsl:for-each select="$currentPage/* [@isDoc]"> </xsl:for-each>
This example selects all xml nodes underneath the currentPage item using the * selector.
However without the [@isDoc] section it would select all nodes including those which are just document type properties.
4. For each child Node via a selectable source
This example shows you how to list childnodes from the nodeID of the contentpicker.
<xsl:param name="Source" select = "$currentPage/mySource" />
<xsl:for-each select = "umbraco.library:GetXmlNodeById($Source)/DocType">
</xsl:for-each>
5. For Each node of a specific Document Type Alias
<xsl:for-each select="$currentPage/ancestor-or-self::Home//MyDocumentType [@isDoc]">
</xsl:for-each>
This example walks upto the top level node/dcoument type with the alias of Home. So this is a fairly expensive XPath call.
Then it looks through all the child nodes no matter how deep to find the node (document type) with the alias of MyDocumentType.
6. Using a Macro parameter to get a Document Type Property
<xsl:value-of select="$currentPage/* [name() = $myMacroParameter and not(@isDoc)]" />
This example selects the child node where it's name matches the value in myMacroParameter and checks to see if that it does not have the isDoc attribute.
7. Using GetMedia Umbraco Method to load Images
This code loops through the images in a media folder as specified by a media picker.
<xsl:for-each select="umbraco.library:GetMedia($images, true())/Image">
<xsl:variable name="picFile" select="umbracoFile"/>
<xsl:variable name="picW" select="umbracoWidth"/>
<xsl:variable name="picH" select="umbracoHeight"/>
<img >
<xsl:attribute name="src">
<xsl:value-of select = "$picFile"/>
</xsl:attribute>
</img>
</xsl:for-each>
That's all for this post, in the next post (Learning Umbraco in a week - Day V) we will have a look at .Net Macros in Umbraco.
No comments:
Post a Comment