Thursday, July 21, 2011

Learning Umbraco in a week - Day II


This is my second post of the "Learning Umbraco in a week" series. The main agenda of this post is listed below.
  • Introduction to Umbraco Document Types
  • Creating Umbraco Document Type 
  • Setting up Umbraco Document Type
  • Introduction to Umbraco Content
  • How to create a Web Page or Content in Umbraco?
  • How to Templatize Umbraco? 
  • Introduction to Umbraco Data Types

Introduction to Umbraco Document Types
Before creating a web page in Umbraco, you must first create a Document Type. Then when you do create the web page, you will specify which Document Type it is based on. 

Document Types are the heart of the content structure of Umbraco and they define which properties the content elements have in detail and the data that a web page will use. It also defines the interface you will see when creating the web page. A Document Type specifies which kind of data, fields (web controls), and content can go on the web page. Document Type have nothing to do with web page presentation or layout - that is handled in Templates. Document Types can be accessed by following the steps below. 

Go to Umbraco Default Page (Admin Page) > Sections > Settings > Document Types.


Creating Umbraco Document Type
To create a Document Type in Umbraco follow the steps below.
  1. Go to Umbraco Default Page (Admin Page) > Sections > Settings.
  2. Right-click on the Document Types folder and enter any name.

Setting up Umbraco Document Type
To set up a Document Type in Umbraco, access the Document Type follow the steps below.

Go to Umbraco Default Page (Admin Page) > Sections > Settings


In the Main Panel (on the right in your browser) you will see the tabs where you define that type.
  • Info - Info tab primarily entails the display options for the Document Type, and which templates can be used.
  • Structure - The Structure tab is where you control the hierarchy of your site by creating child documents.
  • Generic Properties - The Generic Properties tab is where you specify what kind of content can go on web pages that are based on this Document Type. These Properties determine which fields and controls can appear on your web page.
  • Tabs - Tabs tab is where you specify the tabs that will show up when you create a web page based on this Document Type. After you create a tab, you can assign Properties to it in the Properties tab. 

Introduction to Umbraco Content
Content or Web Pages in Umbraco are based on Document Types, i.e. before you can create a Content or Web Page, you must have a Document Type for the type of page you want. The Content or Web Pages can be accessed by following the steps below.

Go to Umbraco Default Page (Admin Page) > Sections > Content.


How to create a Web Page or Content in Umbraco?
To create a Web Page or Content in Umbraco follow the steps below.
  1. If you do not yet have any Web Pages or Content, create one by right-clicking on Content and choosing Create.
  2. Enter a name for the Web Page and click Create. The page will show up under the Content folder (refresh your browser page if you need to).
  3. Click on your new Web Page. In the right panel, you will see the tabs that allow you to set the Content that will appear on the page.
  4. Enter the Content for the Web Page, by entering Content in the tabs in the main panel. If you want your Web Page to contain more types of Content than are allowed here, you must edit the Document Template which is used by the page. To see which Document Type the page uses, go to the Properties tab for the Web Page.
  5. When you’re done, click the "Save and Publish" button in the tool bar.
  6. To see how your Web Page looks in Umbraco, go to the Properties tab for that page, then click the "Link to Document" url at the bottom of the tab.

How to Templatize Umbraco?
Templates define the layout and presentation of a web page. Templates are where you define the design and layout, which CSS to use for the page, etc. By default, when you create a Document Type, a Template is also created for that Document Type, unless it is not desired. To access Umbraco Templates follow the steps below.

Go to Umbraco Default Page (Admin Page) > Sections > Settings > Templates.


Templates are actually ASP .NET Master Pages. Moreover, nesting of Templates is same is nesting Master Pages in ASP .NET, i.e. Templates can be based on other templates.


Introduction to Umbraco Data Types
A Data Type in Umbraco is an editor type associated to the Property. Data Types are not the same as those in computer programming.

A common Type used is "Rich Text Editor", selecting this type will display a rich text editing control to the user during content editing of this Property.
To access Umbraco Data Types follow the steps below.

Go to Umbraco Default Page (Admin Page) > Sections > Developer > Data Types.


That's all for this post, in the next post (Learning Umbraco in a week - Day III) we will go through XSLT & XPATH.

Learning Umbraco in a week - Day I


This is my first post of the "Learning Umbraco in a week" series. The main agenda of this post is listed below.
  • What is a Content Management System?
  • What is a Web Content Management System?
  • A look at some famous Content Management Systems
  • Introduction to Umbraco
  • History of Umbraco
  • Why Umbraco?
  • A look at some famous Umbraco based web sites
  • How to install Umbraco?
  • A look at Umbraco root directory
  • A look at Umbraco Content Management System

What is a Content Management System?
A content management system (CMS) is the collection of procedures used to manage work flow in a collaborative environment.

Below are some benefits of a typical content management system.
  • Low cost
  • Easy customization
  • Easy to use
  • Workflow management 
Below are some of the overheads, one has to bear by having a content management system.
    • Cost of implementation
    • Cost of maintenance
    • Storage volume
    • Latency issues
    • Tool Mixing

    What is a Web Content Management System 
    A web content management system (WCMS) is a software system that provides website authoring, collaboration, and administration tools designed to allow users with little knowledge of web programming languages or markup languages to create and manage website content with relative ease. 

    A look at some famous Content Management Systems. 
    This is a list of famous content management systems that are used to organize and facilitate collaborative content creation. Many of them are built on top of separate content management frameworks. 

    Below is a list of few proprietary content management systems available.
    • SharePoint Server (MOSS)
    • DotNetNuke Professional Edition
    • Oracle ECM Suite
    • IBM Enterprise Content Management 
    • Sitecore Professional Edition
    • OpenText Web Experience Management
    • Day Communiqué WCM
    • EMC Documentum ECM
    • Contegro

    Below is a list of few open source content management systems available.
    • Liferay 
    • Composite C1
    • DotNetNuke Community Edition
    • mojoPortal 
    • Umbraco
    • Joomla!
    • Drupal
    • SilverStripe
    • eZ Publish
    • Geeklog

    Introduction to Umbraco 
    Umbraco is an open source content management system for publishing content on the web and intranets. It is written in the Microsoft .Net (C#) and off course deployed on a Microsoft based infrastructure (i.e. MS Windows, MS IIS etc). 

    History of Umbraco 
    Umbraco was developed by Niels Hartvig in 2000 and released as open source software in 2004. In 2009, CMS Wire described it as one of the leading .NET-based open source CMS systems. This proved to be the turning point in Umbraco CMS history, and In 2010, with thousand downloads a day, Umbraco was in the Top five most popular downloads via the Microsoft Web Platform Installer. 

    Why Umbraco? 
    Umbraco is the choice of many organizations because of the following benefits.
    • Free
    • Open source
    • Easy to learn and use for content writers
    • Built on .Net
    • Supports XML & XSLT for Web Developers
    • Supports ASP .Net development standards
    • Easy to extend
    • Easy to integrate with other systems
    • Strong support community

    A look at some famous Umbraco based web sites. 
    Below is a list of some famous Umbraco based content management systems deployments.
    • http://www.warnerbros.com.au/
    • http://www.asp.net/
    • http://computerfriend.dk/
    • http://www.vogue.co.uk/
    • http://www.heinz.com/
    • http://www.sandisk.com/
    • http://www.redroof.com/

    How to install Umbraco? 
    The easiest and recommended for installing Umbraco on IIS 7, is by using the Microsoft Web Platform Installer. The Web Platform Installer can be found at the following location:

    A look at Umbraco root directory 
    Unlike other content management systems, the Umbraco root directory looks like a typical ASP.NET application root directory. And most of the content created in Umbraco, actually appear as physical files, rather than records in the database. For example, templates or master pages will appear in the masterpage folder, and stylesheets will appear in the css folder.


    Below is a list of most commonly used folders in the Umbraco root directory.
    • Umbraco - This folder contains all the Umbraco CMS files.
    • Master Pages - This folder contains the Templates or Master Pages created in Umbraco.
    • CSS - This folder contains the Stylesheets created and used in Umbraco.
    • Scripts - This folder contains the JavaScript files created in Umbraco.
    • XSLT - This folder contains the XSLT Macro files created in Umbraco.
    • User Controls - This folder contains the User Control Macro files created in Umbraco.
    • Config - This folder contains the Umbraco specific Configuration Files.
    • Application Data - This folder contains the Umbraco specific Data Files.
    • Application Code - This folder may contain the Code Behind Files referred in User Control Macros or Templates. 
    A look at Umbraco Content Management System
    Once Umbraco is installed, you will probably be redirected at the Umbraco default page.


    However, if you are not on the Umbraco Default Page, please point your browser to http://<YourSite>/umbraco/umbraco.aspx. If you are not logged in, you will first be redirected to the Umbraco login page.
    The Umbraco default page has three main panes, which are listed below.
    • Content Listing (Top Left)
    • Sections Listing (Bottom Left)
    • Main Panel (Large Panel on the Right)

    The Content panel on a default empty install will show a only Content folder with the Recycle Bin folder under it.

    Below is a list of Umbraco Sections.
    • Content - This section is shown by default, and is used for creating and managing the content in Umbraco.
    • Media - This section is used for managing media files / items in Umbraco.
    • Users - This section is used for managing Umbraco users, user types, user permissions related to content creation and management.
    • Settings - This section is used for controlling the Umbraco settings related to content management.
    • Developer - This section provides useful features for techies, as it is related to development of portal in Umbraco.
    • Members - This section is used for creating and managing portal members, member groups and member types in Umbraco. 

    That's all for this post, in the next post (Learning Umbraco in a week - Day II) we will go through the Umbraco CMS.

      Tuesday, June 14, 2011

      Running Umbraco on .Net Framework 4.0


      This post is about an unusual configuration issue that, many Umbraco developers face when they first try to upgrade their Umbraco installation to .Net Framework 4.0. It is unusual in a sense that over the last few framework releases there has been a norm that the web.config schemas were backward compatible and it was never required to update the configurations during an upgrade.

      .Net Framework 4.0 has been launched with a new machine.config file, and off course it doesn't override the earlier machine.config in use by previous frameworks. The following changes have been done in the new machine.config:
      • ASP .NET Tag Sections
      • ASP .NET AJAX
      • ASP .NET Dynamic Data
      • ASP .NET Routing
      • ASP .NET Chart Control
       So, we will need to omit all the above mentioned items form our web.config, so that Umbraco starts working with .Net Framework 4.0.
      1. Set the web site's  Application Pool to ASP.NET v4.0.
      2. Remove/Comment the sectionGroup named "system.web.extensions" under configSections tag.
      3. Change the compilation tag and set the targetFramework attribute to 4.0 
        <compilation defaultLanguage="c#" debug="true" batch="false" targetFramework="4.0">
      4. Delete the whole assemblies section below that compilation tag.
      5. Remove/Comment the controls having "asp" tagPrefix, under system.web/pages/controls tag.
      6. Remove/Comment all handlers and modules specific to "ASPNETAJAX", under system.webServer and system.web tags.
      7. Most importantly, search for "Version=3.5.0.0" text in you web.config and replace it with "Version=4.0.0.0".
      8. Finally, make sure you have the "Microsoft.Scripting.ExtensionAttribute.dll" in Umbraco bin directory, i.e. most probably at "c:\inetpub\wwwroot\bin".
      That's all folks, enjoy Umbraco development on .Net Framework 4.0.

      Saturday, February 19, 2011

      CTrayIcon - System Tray Icon Wrapper

      Click here to Skip to main content

      Introduction

      The system tray icon notification area -- or "systray" or "taskbar notification system area" -- is a section of the taskbars in the Microsoft Windows desktop user interface. This section displays the clock and the icons of certain programs so that a user is continually reminded that they are there and can easily click one of them. Unfortunately, MFC does not contain a class to wrap system tray functionality. So, I decided to write one and put it up for public use.


      Background

      The system tray is a section located at the one end of the taskbar in Windows 9x, and NT (Family). Icons that are often installed in the system tray include the volume control for sound, anti-virus software, and a system resources indicator. When more icons are installed in the system tray than can fit in the space allotted, the system tray becomes horizontally scrollable or expandable. To interact with a program in the system tray, you select an icon with your mouse and double-click or right-click the icon. When you minimize the program after using it, it shrinks back into the system tray instead of into the main part of the taskbar.

      What makes a system tray icon special is that, when installed, it can have a customized message appear when the mouse is hovering over it. The menu that appears when you right-click it can be customized and the action that occurs when you double-click it can also be customized. For example, the double-click action for Internet Explorer could be to launch (start, or open a window for) the program, but the double-click action for a desktop icon could be to "View desktop," i.e. remove the active windows and show the underlying desktop.

      An icon can be placed in the system tray when a program is installed by making an entry in the system registry. It can also be placed later by creating a shortcut to a program and dragging the shortcut icon to the system tray. An icon can be removed by deleting the registry entry or by right-clicking it and selecting Delete on the pop-up menu. The clock is removed by deselecting the show clock option in the taskbar Properties.


      About CTrayIcon

      JTray Menu Screenshot - Metal Menu


      CTrayIcon lets VC++ developers add icons to the Windows system tray. This quickly makes any VC++ application more attractive and intuitive to Windows users.

      CTrayIcon can display pop-ups. This allows developers to modify the look and feel and add powerful menu items.
      JTray Balloon Message Screenshot

      With CTrayIcon, tray icons can have Tool Tip Text that appears during a mouse-over. In addition, a cool mouse-hover effect is provided.


      CTrayIcon class summary

      This class is a wrap around the system tray icon notification. It adds a specified set of icon-pairs -- i.e. icons & hover-icons -- and tooltips to the system tray notification area, as well as a callback notification handler for mouse message handling.


      CTrayIcon construction

      Syntax

      // Use if notification messages are to be 
      // sent to the parent window. 
      CTrayIcon(
          CWnd *pWnd,
          unsigned int uNotificationMessage,
          MouseMsgHandlerPtr *pMouseMsgHandler,
          unsigned int uHandlersCount,
          IconDataPtr *pIconData,
          unsigned int uIconsCount,
          int nSelectedIconIndex,
          unsigned int uElapsed
          );
       
      // Use if notification messages are to 
      // be sent to the CTrayIcon class.
      CTrayIcon(
          MouseMsgHandlerPtr *pMouseMsgHandler,
          unsigned int uHandlersCount,
          IconDataPtr *pIconData,
          unsigned int uIconsCount,
          int nSelectedIconIndex,
          unsigned int uElapsed
          );


      Parameters

      • pWnd: Pointer to the window that receives notification messages associated with an icon in the taskbar status area. If the pWnd parameter is not provided, then the function CTrayIcon::OnNotifyIcon will be called whenever the icon sends a notification message.
      • uNotificationMessage: Message identifier for handling proper mouse notification messages associated with an icon in the taskbar status area. If a uNotificationMessage parameter is not provided, then a new window message is registered -- i.e. ::RegisterWindowMessage(_T("NotifyIcon") -- and is used as a default notification message identifier.
      • pMouseMsgHandlerPtr: An array of pointers to objects of classes derived from CTrayIconMouseMsgHandler to handle mouse messages.
      • uHandlersCount: Indicates the number of handlers in the array pointed to by pMouseMsgHandlerPtr.
      • pIconDataPtr: An array of pointers to objects of CIconData -- i.e. units of icons, hover icons, and tool tips -- to be added to the taskbar status area.
      • uIconsCount: Indicates the number of icons in the array pointed to by p IconDataPtr.
      • nSelectedIconIndex: Index of the selected icon in the array pointed to by p IconDataPtr.
      • uElapsed: Indicates the elapsed time for the taskbar status area icon animation timer.


      CTrayIcon getters and setter

      // Sets the notification message target window
      void SetTargetWnd(CWnd *pWnd);
       
      // Sets the notification message identifier
      void SetNotificationMsg(unsigned
      int uNotificationMsg);
       
      // Sets the selected icon index
      void SetSelectedIconIndex(int nIconIndex);
       
      // Gets the selected icon index
      int GetSelectedIconIndex() const;
       
      // Sets the mouse message handler
      void SetMouseMsgHandler(
          MouseMsgHandlerPtr *pMouseMsgHandler, 
          unsigned int uHandlersCount);
       
      // Gets the mouse message handler
      MouseMsgHandlerPtr* GetMouseMsgHandler()
      const;
       
      // Sets timer elapse
      void SetTimerElapse(unsigned int uElapse);
       
      // Gets timer elapse
      int GetTimerElapse() const;
       
      // Sets icon data
      void SetIconData(IconDataPtr *pIconData, unsigned
      int uIconsCount);
       
      // Gets icons data
      IconDataPtr* GetIconData()
      const;
       
      // Indicates whether animation is in progress
      BOOL IsAnimating () const


      CTrayIcon methods

      // Dispalys a hidden icon
      BOOL ShowIcon();
       
      // Hides a visible icon
      BOOL HideIcon();
       
      // Refreshes icon
      BOOL RefreshIcon();
       
      // Shows the hover icon
      BOOL HoverIcon();
       
      // Starts icon animation
      BOOL StartIconAnimation();
       
      // Stops icon animation
      BOOL StopIconAnimation();


      CTrayIcon events & callbacks


      OnTaskBarCreated

      This is used to process the WM_TI_TASKBARCREATED message for verifying taskbar status icon creation.


      Syntax

      // Callback handler for the taskbar created event 
      LRESULT OnTaskBarCreated( 
          WPARAM wParam, 
          LPARAM lParam 
          ); 


      Result

      Returns the LRESULT after verification.


      OnNotifyIcon

      This is used to process the WM_TI_NOITIFYICON message for proper mouse message handling.


      Syntax

      // Default callback handler for 
      // taskbar notification message event 
      LRESULT OnNotifyIcon(
          WPARAM wParam, 
          LPARAM lParam 
          ); 


      Result

      Returns the LRESULT after verification.


      WindowProc

      This provides a Windows procedure for a CTrayIcon object. The WindowProc function is an application-defined function that processes messages sent to a window.


      Syntax

      // Callback handler for the window procedure 
      LRESULT WindowProc( 
          unsigned int uMsg, 
          WPARAM wParam, 
          LPARAM lParam 
          );


      Result

      Returns the LRESULT after verification.


      OnTimer

      This is used to process the WM_TIMER messages, triggered as soon as the elapsed time has passed.


      Syntax

      // Callback handler for the timer elapsed event 
      void OnTimer( 
          unsigned int uIDEvent 
          );


      CTrayIconMouseMsgHandler class summary

      This class stands as an abstract base-class for handling mouse notification messages. Classes derived from CTrayIconMouseMsgHandler should handle mouse notification messages and must implement the pure-virtual MouseMessageHandler() method.


      CTrayIconMouseMsgHandler construction

      Only a single parameter constructor is available that takes a Window message to be associated with it for receiving other system tray icon notification messages.


      Syntax

      // Single paramenter constructor, a 
      // mosue message identfier has to be passed
      CTrayIconMouseMsgHandler( 
          unsigned int uMouseMsgID 
          );


      Parameters

      uMouseMsgID Windows messages that the OS generates when the user performs any action with the mouse over the system tray icon. For example, the pressing or releasing of the mouse buttons, etc.


      CTrayIconMouseMsgHandler getters and setters

      // Gets the mouse message identifier 
      unsigned int GetMouseMsgID() const; 
       
      // Sets the mosue message identifier 
      void SetMouseMsgID(
          unsigned int uMouseMsgID
          );


      CTrayIconMouseMsgHandler events & callbacks


      MouseMsgHandler

      This method is a pure-virtual method and must be defined in the derived classes for handling system tray icon mouse notification messages. This event is generated by the CTrayIcon::OnNotifyIcon() method.


      Syntax

      // Pure-virtual callback mouse message handler, 
      // necessary to be implemented by the derived class, 
      // for handling system tray icon notifications. 
      virtual void MouseMsgHandler() = 0;


      CTrayIconMouseMsgHandler synonyms


      MouseMsgHandlerPtr

      // Synomym for CTrayIconMouseMsgHandler pointer 
      typedef CTrayIconMouseMsgHandler* MouseMsgHandlerPtr;


      CIconData class summary

      This class encapsulates a set of icon-pairs -- i.e. icons & hover-icons -- and tooltips for the system tray notification area. It wraps the basic functionality to switch between icon & hover-icon, as well as between two different CIconData objects along with their respective tooltips.


      CIconData construction

      For object creation, a quad parameter constructor is available that takes icon-pair (icon & hover-icon) identifiers -- where hover-icon is optional -- a tooptip and an optional handler to an icon.


      Syntax

      // Quad parameter constructor 
      CIconData(
          unsigned int uDefaultIconID, 
          LPSTR lpToolTip,
          unsigned int uHoverIconID = 0, 
          HICON hIcon = NULL
          );
       
      // Copy constructor
      CIconData(
          const CIconData &pIconData
          );


      Parameters

      • uDefaultIconID: Application-defined identifier of an icon, to be showed in the system tray icon notification area.
      • lpToolTip: Pointer to a null-terminated string with the text for a standard ToolTip. It can have a maximum of 64 characters, including the terminating NULL.
      • uHoverIconID: Application-defined identifier of an icon, to be showed in the system tray icon notification area during mouse-hover.
      • hIcon: Handle to the icon to be added, modified or deleted. To avoid icon distortion, be aware that notification area icons have different levels of support under different versions of Microsoft Windows. Windows 95, Windows 98, and Microsoft Windows NT 4.0 support icons of up to 4 bits per pixel (BPP). Windows Millennium Edition (Windows Me) and Windows 2000 support icons of a color depth up to the current display mode. Windows XP supports icons of up to 32 BPP.


      CIconData getters and setters

      // Gets the selected icon's identifer
      unsigned int GetIconID() const;
       
      // Gets the default icon identfier
      unsigned int GetDefaultIconID() const;
       
      // Sets the default icon identifier
      void SetDefaultIconID(unsigned int uIconID);
       
      // Gets the hover icon identifer
      unsigned int GetHoverIconID() const;
       
      // Sets the hover icon identifier
      void SetHoverIconID(unsigned int uIconID);
       
      // Gets the tooltip
      LPSTR GetToolTip() const;
       
      // Sets the tooltip
      void SetToolTip(LPSTR lpToolTip);
       
      // Gets the icon handler
      HICON GetIconHandler() const;


      CIconData methods

      // Selects and loads the speciifed icon into memory
      bool LoadIcon(unsigned int uIconID);


      CIconData synonyms


      IconDataPtr

      // Synomym for CIconData pointer 
      typedef CIconData* IconDataPtr;


      How to use

      Let's go step-wise to accomplish our task.


      Step 1 - starting

      Create an application and add the TrayIcon.h, TrayIcon.cpp, TrayIconMouseMsgHandler.h, IconData.h, Utilities.h and MouseMsgHandlerImpl.h files to the project.


      Step 2 - pre-empting reusability

      It is always beneficial to set up a global header library of reusable utility methods that can be used anywhere in the project.
      // Utilities functions
      // Shows a window
      BOOL ShowWnd(CWnd* pWnd)
      {
          return pWnd->ShowWindow(SW_SHOW);
      }
       
      // Hides a window
      BOOL HideWnd(CWnd* pWnd)
      {
          return pWnd->ShowWindow(SW_HIDE);
      }
       
      // Shows a popup menu
      void ShowPopupMenu(CWnd* pWnd, 
          unsigned int uResourseID, int nSubMenuPos)
      {
          CPoint aPos;
          GetCursorPos(&aPos);
          CMenu aMenu;
          aMenu.LoadMenu(uResourseID);
          aMenu.GetSubMenu(nSubMenuPos)->TrackPopupMenu(
              TPM_RIGHTALIGN | TPM_RIGHTBUTTON, 
              aPos.x, 
              aPos.y, 
              pWnd, 
              0
              );
      }


      Step 3 - setting up mouse message handlers

      In this phase, we will set up a few classes derived from CTrayIconMouseMsgHandler to handle mouse notification messages.


      Setting up left mouse double click message handler

      // Left mouse button double click message handler
      class CLeftMouseDblClickMsgHandler:  
          public CTrayIconMouseMsgHandler
      {
          public: 
          CLeftMouseDblClickMsgHandler() : 
      CTrayIconMouseMsgHandler(
              WM_LBUTTONDBLCLK){}
       
          void MouseMsgHandler()
          {
              ShowWnd(AfxGetMainWnd());
          }
      };


      Setting up right mouse click message handler

      // Right mouse button click message handler
      class CRightMouseClickMsgHandler: 
          public CTrayIconMouseMsgHandler
      {
          public: 
          CRightMouseClickMsgHandler() : 
      CTrayIconMouseMsgHandler(
              WM_RBUTTONDOWN){}
       
          void MouseMsgHandler()
          {
              ShowPopupMenu(AfxGetMainWnd(), 
      IDR_TASKBAR_MENU,  
                  0);
          }
      };


      Setting up mouse hover message handler

      // Mouse hover message handler
      class CMouseHoverMsgHandler:  
          public CTrayIconMouseMsgHandler
      {
          public: 
          CMouseHoverMsgHandler(CTrayIcon* pTrayIcon) : 
      CTrayIconMouseMsgHandler(
              WM_MOUSEFIRST)
          {
              m_pTrayIcon = pTrayIcon;
          }
       
          void SetTrayIcon(CTrayIcon* pTrayIcon)
          {
              m_pTrayIcon = pTrayIcon;
          }
       
          void MouseMsgHandler()
          {
              m_pTrayIcon->HoverIcon();
          }
       
          private:
          CTrayIcon* m_pTrayIcon;
      };


      Step 4 - declaring

      Add a member to your class that points to CTrayIcon.
      // Declarying CTrayIcon object pointer for adding 
      // an icon to the system tray notification area
      CTrayIcon* m_pTrayIcon;


      Step 5 - initialization

      In this phase, we will initialize the CTrayIcon object to add icon to the system tray notification area.
      // Declare an array of MouseMsgHandlerPtr of size 3, 
      // to handle three types of mouse events
      MouseMsgHandlerPtr *pHandler = new MouseMsgHandlerPtr[3];
       
      // Define an object for handling right mouse button 
      // click events
      MouseMsgHandlerPtr rbcHandler = 
          new CRightMouseClickMsgHandler();
       
      // Define an object for handling left mouse button 
      // double click events
      MouseMsgHandlerPtr lbcHandler =  
          new CLeftMouseDblClickMsgHandler();
       
      // Define an object for handling mouse hover events
      MouseMsgHandlerPtr mhHandler = 
          new CMouseHoverMsgHandler(m_pTrayIcon);
       
      pHandler[0] = lbcHandler;
      pHandler[1] = rbcHandler;
      pHandler[2] = mhHandler;
       
      // Declare an array of IconDataPtr of size 2, 
      // to add two sets of icons. Only one will be 
      // active though.
      IconDataPtr *pIconData = new IconDataPtr[2];
       
      // Define an object of Blue MFC icon
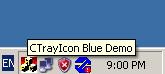
      pIconData[0] = new CIconData(IDR_MAINFRAME, 
      _T("CTrayIcon Blue Demo"), 
          IDR_MAINFRAME_HOVER);
       
      // Define an object of Green MFC icon
      pIconData[1] = new CIconData(
          IDR_MAINFRAME_GREEN, 
      _T("CTrayIcon Green Demo"), 
      IDR_MAINFRAME_HOVER);
       
      // Define the CTrayIcon object
      m_pTrayIcon = new CTrayIcon(pHandler,  
          3
      pIconData,  
          2,  
          0
      SECOND);
       
      // Refer the CTrayIcon object to the 
      // CMouseHoverMsgHandler object, for handling 
      // mouse events
      ((CMouseHoverMsgHandler*)mhHandler)-> 
      SetTrayIcon(m_pTrayIcon);


      Step 6 - setting up functionality

      In this phase, we will set up functionality to hide, show and animate the system tray notification icon.


      Showing the tray notification icon

      void CCTrayIconDemoDlg::OnBnClickedBtnshowicon()
      {
          m_pTrayIcon->ShowIcon();
      }


      Hiding the tray notification icon

      void CCTrayIconDemoDlg::OnBnClickedBtnhideicon()
      {
          m_pTrayIcon->HideIcon();
      }


      Starting the tray notification icon animation

      void CCTrayIconDemoDlg::OnBnClickedBtnstartani()
      {
          m_pTrayIcon->StartIconAnimation();
      }


      Stopping the tray notification icon animation

      void CCTrayIconDemoDlg::OnBnClickedBtnstopani()
      {
          m_pTrayIcon->StopIconAnimation();
      }


      Minimizing the window to the tray notification icon

      void CCTrayIconDemoDlg::OnBnClickedBtnminimize()
      {
          m_pTrayIcon->ShowIcon();
          HideWnd(this);
      }


      Showing the window from the tray notification icon

      void CCTrayIconDemoDlg::OnShow() 
      {
          ShowWnd(this);
      }


      Step 7 - the finishing touch

      Once we are done, we release the resources gracefully.
      void CCTrayIconDemoDlg::OnCancel() 
      {
          delete m_pTrayIcon;
          CDialog::OnCancel();
      }


      Alternate step - the other way around

      In the above steps, we saw how efficiently we can handle the system tray notification icon messages by using the CTrayIcon class. What if you want to handle those messages in you own CWnd class? Implement this phase if you'd like to handle the system tray notification icon messages in you CWnd or CDialog class. In this example, that class would be the CCTrayIconDemoDlg class. Go to the header file and register a Window message to be handled once the system tray notification icon is created.

      const unsigned int WM_TI_NOTIFYICON = 
          ::RegisterWindowMessage(_T("TaskBarCreated"));

      Go to AFX_MSG and add the line in bold.
      //{{AFX_MSG(CCTrayIconDemoDlg)
      virtual BOOL OnInitDialog();
      afx_msg void OnSysCommand(UINT nID, LPARAM lParam);
      afx_msg void OnPaint();
      afx_msg HCURSOR OnQueryDragIcon();
      afx_msg void OnNotifyIcon(WPARAM wp, LPARAM lp);
      //}}AFX_MSG

      Then go to AFX_MSG_MAP and add the line in bold.
      //{{AFX_MSG_MAP(CCTrayIconDemoDlg)
      ON_WM_SYSCOMMAND()
      ON_WM_PAINT()
      ON_WM_QUERYDRAGICON()
      ON_REGISTERED_MESSAGE(WM_TI_NOTIFYICON, OnNotifyIcon)
      //}}AFX_MSG_MAP

      Replace the CTrayIcon object creation with the following code.
      // Define the CTrayIcon object
      m_pTrayIcon = new CTrayIcon(
          this, WM_TI_NOTIFYICON, pHandler, 
          3, pIconData, 2, 0, SECOND);

      Finally, redirect to the CTaskIcon method.
      void CCTrayIconDemoDlg::OnNotifyIcon(WPARAM wParam, 
      LPARAM lParam) 
      { 
          // TODO
          m_pTrayIcon->OnNotifyIcon(wParam, lParam);
      }


      History

      • 23 August, 2004 -- Original version posted
      • 6 June, 2007 -- Article and downloads updated


      Reference